Getting started with WinGet Studio: Stop fighting YAML, start building
Learn how you can use WinGet Studio to create configuration documents


You've been there, blankly staring at a WinGet configuration file. With each YAML line, you're second-guessing if the indentation still looks proper.
You're trying to set up a configuration file that scales. But instead of focusing on what matters, you're trying to debug the syntax error if it's like 2005.
While YAML is better than JSON and machines, it's not easy to craft it by hand (even with all the tooltips you get).
WinGet Studio just went GA during Ignite and aims to solve this challenge—no more fighting with indentation or copying configurations from Stack Overflow.
This guide will get you from shipping your first configuration in under 15 minutes. You'll learn about DSC resources, validating each document, and enjoy creating these documents. Let's get this fixed up.
By the end of this guide, you'll be able to:
- Create and manage WinGet configuration files visually.
- Validate DSC resources without breaking your system.
- Test configurations before applying them.
- Exporting the existing system state to reusable configurations.
Prerequisites
Before you start with this guide, make sure you're working on a Windows 11 version 22H2 or later. This comes with winget.exe pre-installed. You also need:
To install WinGet Studio, you can use two methods:
Use GitHub:
Download WinGet Studio from GitHub releases page.
Use WinGet:
To install WinGet Studio using the command-line:
winget install --id Microsoft.WinGetStudio.Experimental --source wingetAfter you've installed WinGet Studio, let's take a look at the interface.
Understanding the interface
When you first launch WinGet Studio, you'll see three main options:
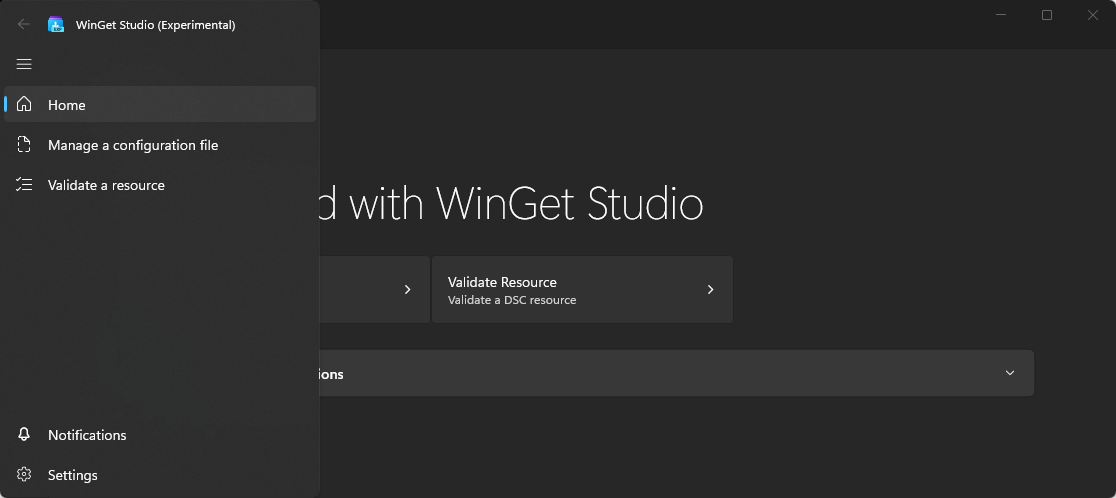
The "Manage a configuration file" is where you'll spend most of your time. This can create a new configuration file, edit existing ones, and apply them to your system.
In the "Validate a resource" menu, you can test your configuration files. See this as your testing playground to check for valid syntax before going to production.
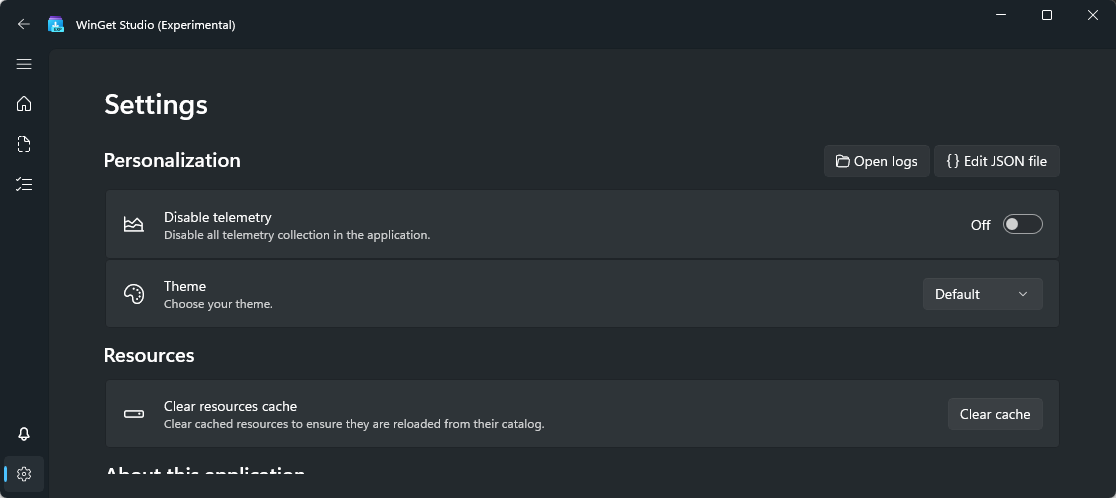
Then lastly, the "Settings" menu. Here's where you can customize WinGet Studio, find the log files, clear the cache, or change your theme.
Your first configuration
Let's start by creating our first configuration file. We'll keep it simple by installing Microsoft Visual Studio Code:
- Click Manage a configuration file on the home screen.
- Select New configuration from the toolbar.
- WinGet Studio creates an empty configuration file for you:
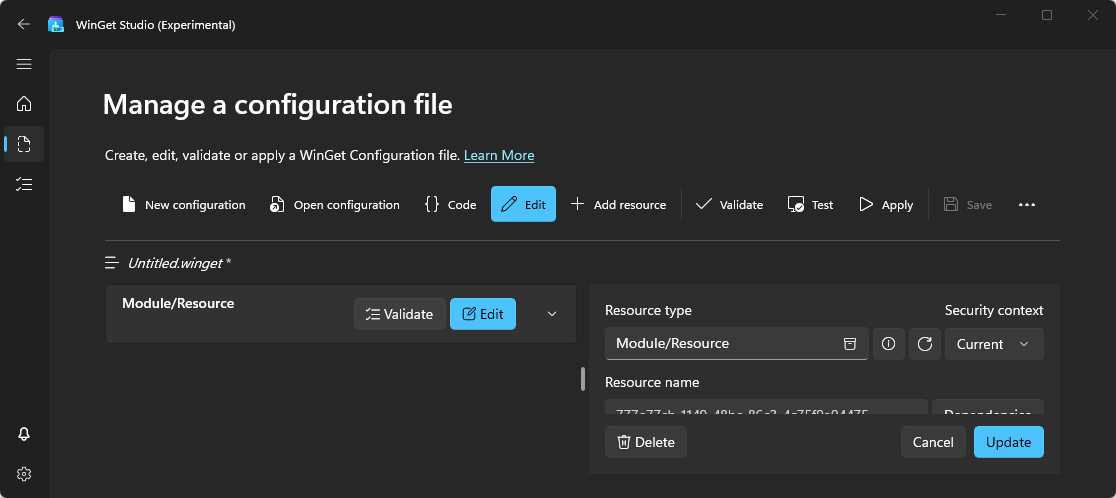
Time to add a resource:
- In the Resource type field, type in
Microsoft.WinGet/Package. - Add the Description "Install VSCode".
- To configure the resource, add the following fields in the code view in the right editor and press Update
Id: Microsoft.VisualStudioCode
Ensure: Present
What just happened? You've added your first DSC resource. Resources are the building blocks of WinGet Studio. Because you've WinGet installed, the WinGetPackage DSC resource is exposed to WinGet studio.
Now you can save the file to disk by pressing the three dots, select Save as, and giving it a descriptive name vscode-setup.winget. After saving the file, you can validate the resource by pressing Validate. This should return a notification that the code is valid. Your first syntax check is completed.
Now the moment of truth. When you press Apply, a warning message is displayed:
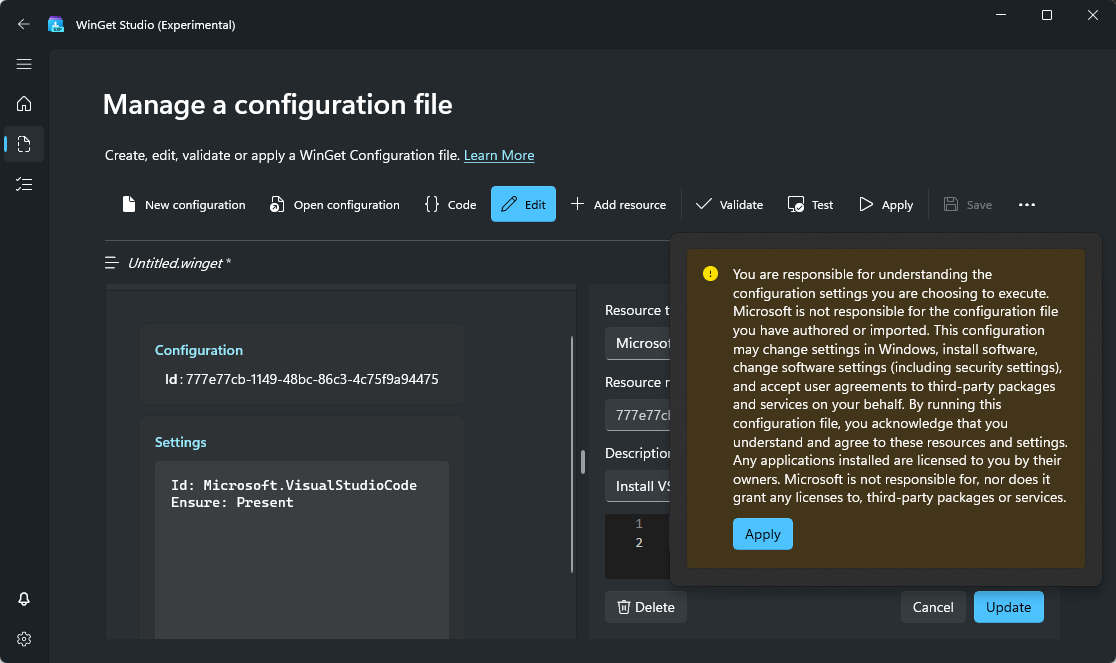
Read the warning, then press Apply again. And that's it, your first configuration file is applied, and Visual Studio Code should be installed on your system.
Validating individual resources
Whilst you've now already officially applied your first configuration file and broke the tip earlier, it was a safe operation to do. But if you go to production, you need to test individual resources and potentially test the behaviour with different properties available.
That's where the validate a resource feature becomes your lovely friend. In the menu, you're going to find three operations:
- Get - gets your current configuration
- Test - to see if your system matches the desired state
- Set - your system in the desired state
Each operation can be individually tested. Let's go through each of them to see what happens.
- In the search box, type in
Microsoft.WinGet/Packageagain. - Add the
id: Microsoft.VisualStudioCodein the Settings field. - Press Get
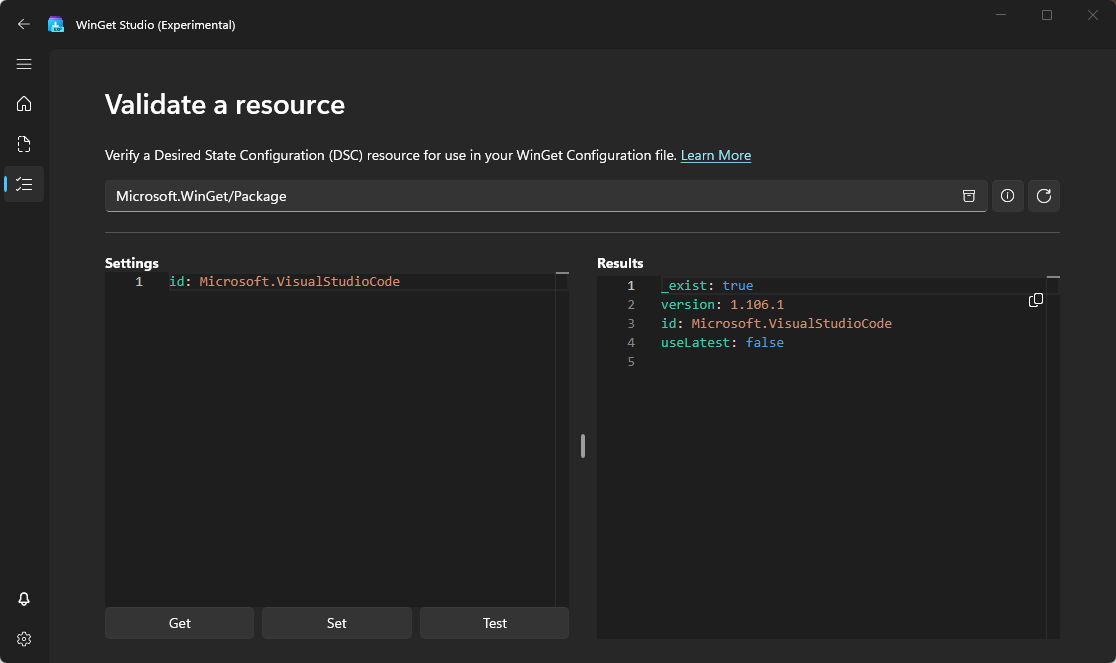
This gets the current state of your system. As you can see, it returned four properties:
- The
_existproperty indicates that the resource exists on the system. - The
versionproperty shows what version is installed. - The
idproperty is the unique identifier of a package. - The
useLatestproperty is a boolean flag to use the latest version of a package.
Imagine that you now want a different version to be installed. The actual latest version as per today is 1.106.2. To test this out, you can add the version property in the Settings.
- Add the
version: 1.106.2property in the Settings field. - Press Test to see if the system is in the desired state.
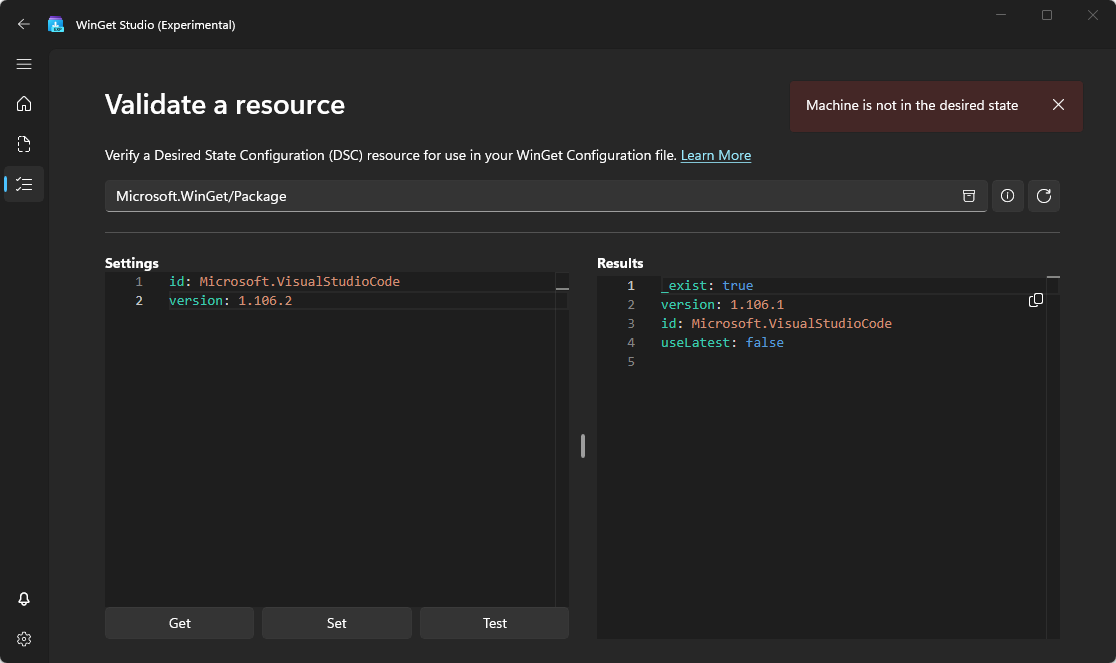
Of course, we already knew that the machine was out of its desired state because version 1.106.1 was installed. But in this way, you can validate systems that aren't in the desired state.
If you haven't installed version 1.106.2, you can press the Set button, which is going to upgrade your package by calling winget.exe upgrade underneath.
Pro tips for managing configurations
You've going through each menu option and learned how to create a configuration file, validate it, and apply it. But what about the actual properties themselves? Where do they come from?
WinGet Studio has a long laundry list of improved functionality that will eventually make discovery and working with resources easier. But for now, here are some tips to work better with what you've already learned.
Tip 1: Finding resource properties
Every DSC resource has different properties, and knowing which ones exist is half of the battle. To find available properties, follow the steps below:
- In the Validate a resource section, search for
Microsoft.WinGet/Package. - Once selected, press the Information button.
- Press the View JSON schema

This opens up the JSON schema for Microsoft.WinGet/Package, displaying all available properties. Notice the required field. The id property is always mandatory. The rest is optional.
Another way you've already seen when using the Get operation. This partially returned the available properties already.
Tip 2: Manage configurations in code editor
The WinGet Studio visual editor is great. But if you're already a pro, you can manage configuration files using the code editor:
- Open the Manage a configuration file menu.
- Select New configuration and press Code.
- Paste in the following YAML code:
$schema: https://raw.githubusercontent.com/PowerShell/DSC/main/schemas/2023/08/config/document.json
metadata:
  winget:
    processor:
      identifier: dscv3
resources:
- type: Microsoft.WinGet/Package
  name: Visual Studio Code
  properties:
    id: Microsoft.VisualStudioCode
    version: 1.106.2
You've now manually crafted the WinGet configuration file. Press Apply changes to set the actual changes. This will update the right panel editor view.
Now, imagine that after installing VS Code, you want to install an extension right away. How will WinGet know that it dependsOn another resource? Well, you specify that property, actually.
- Re-open the Code editor.
- Paste in the following YAML code:
$schema: https://raw.githubusercontent.com/PowerShell/DSC/main/schemas/2023/08/config/document.json
metadata:
  winget:
    processor:
      identifier: dscv3
resources:
- type: Microsoft.WinGet/Package
  name: Visual Studio Code
  properties:
    id: Microsoft.VisualStudioCode
    version: 1.106.2
- type: Microsoft.VSCode.Dsc/VSCodeExtension
  name: PowerShell Extension
  dependsOn:
  - "[resourceId('Microsoft.WinGet/Package', 'Visual Studio Code')]"
  properties:
name: ms-vscode.powershell- Press Validate.
Notice the code has validated successfully. This is because WinGet Studio underneath leverages dsc.exe engine. DSC's engine allows adding ARM expressions. In this case, it uses the resourceId() function to grab the existing resource for reference.
Summary
You've successfully gone through WinGet Studio using both the graphical user interface (GUI) and YAML. You created a configuration file without wrestling with YAML much.
Resources are validated using Get, Test, and Set. WinGet Studio makes the job easier, and you can now configure something.
For more information, check out the GitHub repository.